Grafting Cactus Seedlings onto Pereskiopsis spathulataPage Contents
Words you may need to knowSterilize: Making something extremely clean and free from any bacteria/fungus etc. Root stock: The cactus you will use on the bottom, that is being used with roots to help the other grow. Scion: The cactus you will be placing on top of another, in hopes of increased growth.
IntroductionThe reason for grafting can vary slightly, but it all boils down to faster growth. Grafting another cacti onto a different species is generally done for growth speed, flower production, or to grow plants with no chlorophyll (plants with no green cannot absorb light on their own). Any number of root stocks can be used but generally they need to be of a hardy nature, grow fast, and be able to resist stress (ie over watering, bright sun, dark shade etc...). Determining which root stock is best for which scion can often save you a headache later on down the road. Some root stocks are only good for smaller cacti, some only keep their stamina for a few years, while others may last for a very long time with good results. Pereskiopsis spathulata is mostly used for seedlings because it is amazingly resilient to rot, takes in water like a champion and is probably the fastest growing cacti around. ConsiderationsPerhaps thinking about what you want to accomplish before you start grafting is a wise decision. Pereskiopsis spathulata is indeed an amazingly fast growing cactus. It is excellent for grafting many species, but it too has drawbacks. Over time it seems to loose it magic and slows down, this may take 2 yeas or 10, depends on your specimens and conditions. It is also a fairly small circular stemmed cactus, this may make it not so ideal, especially if you are wanting to graft larger specimens. We often use Pereskiopsis for slow growing smaller cacti that we want to boost. This cactus is second to none in that it will make a seedling a 3 cm plant in one year with very slow growing species. But this insane growth is relatively short lived in some cases. The reason for grafting can vary slightly, but it all boils down to faster growth. Grafting another cacti onto a different species is generally done for either growth, flowers production, or to grow plants with no chlorophyll. Any number of root stocks are can be used but generally they need to be of a hardy nature, grow fast, and be able to resist stresses. Determining which root stock is best of which scion can often save you a headache later on down the road. Some root stocks are only good for smaller cacti; some only keep their stamina for a few years, while others may last for a very long time with good results. Pereskiopsis spathulata is chosen mostly for seedlings because it is amazingly resilient to rot, takes in water like a champion and is probably the fasted growing cacti around. Materials you will need-A healthy actively growing rootstock -A healthy actively growing scion of similar diameter -Well lit, well ventilated workplace, a desk or table. -sharp razor blade. Thin sharp blades work best. -Rubbing alcohol 70%+ -Alcohol lamp and lighter (optional) -Tweezers (optional) -Tissue paper/cloth (clean) -Plastic bag, 2 liter pop bottle etc...see "After Care" -Rubber gloves 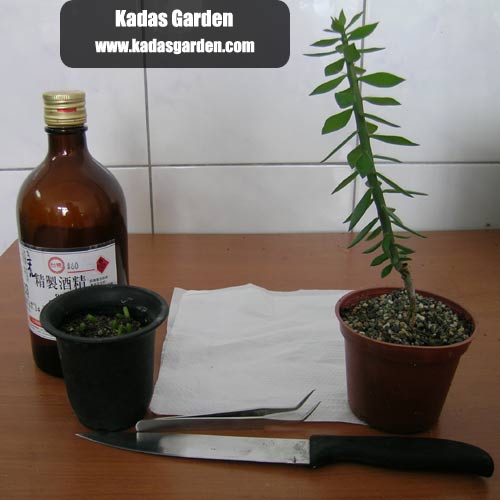
Understanding the graftThere is really not too much to be said about understanding how a graft works. Think of it as water pipes to the top floor of an office building. You want the best most efficient water pipes around (rootstock) because your scions piping is not very efficient. So in order to make the graft, you at least need to attach these pipes together so they can begin. Failing to line them up well, will usually result in a slow growing or dead scion. 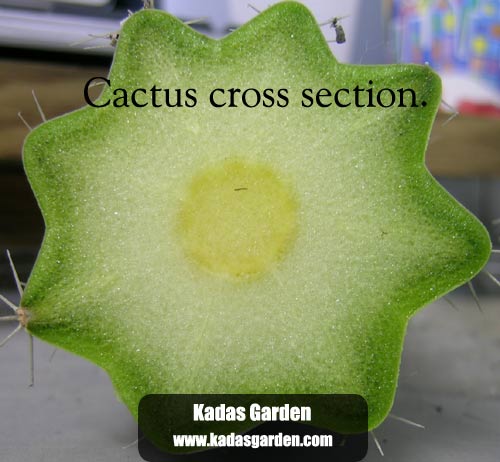
When looking at a cut cactus you will notice inside there is a ring, or circle. These are the cambium tissue (water pipes), this is what you need to line up in order to get a good, fast growing scion. The more you line up the faster it will grow. Look at the drawing below. The green rings are your rootstocks' water pipes, and the red ring is your scions' pipes. See how they can and cannot be lined up together. 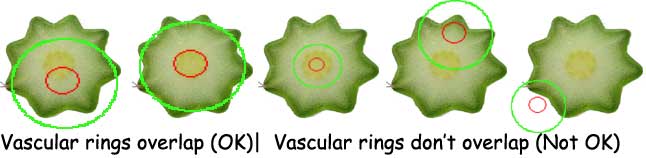
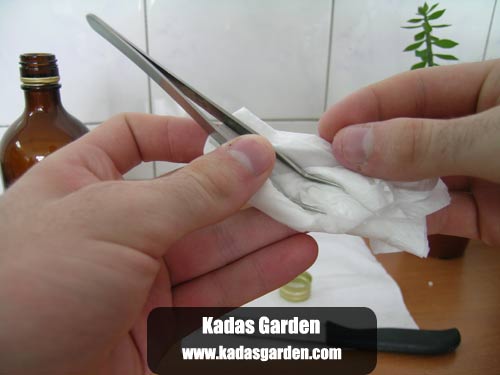
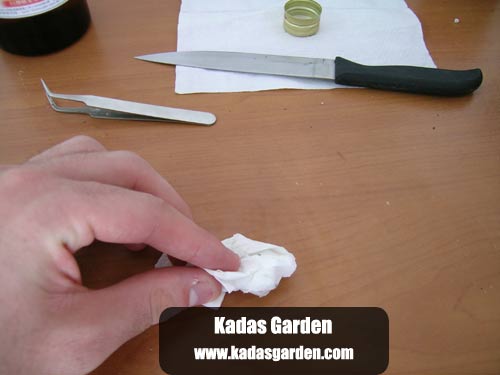
As well as more water getting to your graft, increasing growth, it is also beneficial to have increased energy going there as well. This is another area that Pereskiopsis is ideal as it has true leaves. This cactus can absorb quite a lot of sunlight due to its large surface area, so when you are grafting be sure to choose a fully leaved specimen, and take care not to break too many leaves off. One last consideration is the fact that if you do not move quick the rootstock and/or scion might start to dry and heal its cut before you place them together. Drying will "close" the water pipes (like a cut that heals) and the graft may or may not fuse together. In order to ensure they are not dry, be sure to make the cuts last and work quickly afterwards. See more later. Getting startedBefore we start cutting open our cacti we need to understand one thing. Everything must be clean! There are mold spores in every crevice of our work station, and they are not going away. In order to help prevent infection later on we need to try our best at cleaning everything. To do this, alcohol (Isopropyl 70%+, Ethanol 70%+) is our weapon of choice. Alcohol of this nature is not for drinking purposes and can be quite unhealthy, so be sure to do this in a room that is ventilated, and be sure to wear gloves to prevent contact. You can either use straight alcohol and wipe down your knife/razor, forceps and table where you will be working. Or you can use an alcohol lamp (alcohol candle) to sterilize the metal objects like tweezers and knife. We use a tissue and wipe down the table and thoroughly clean the knife and tweezers right before cutting. 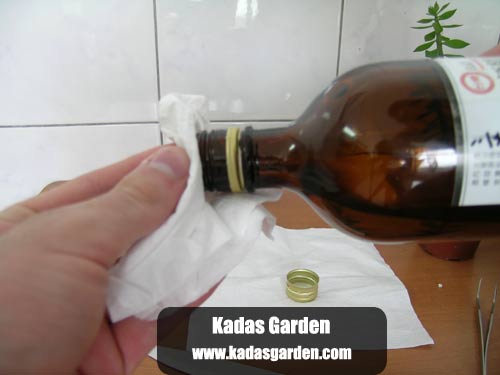 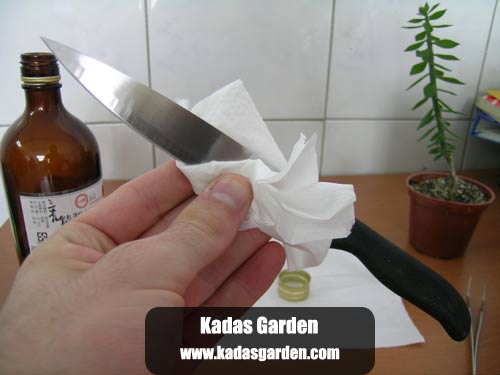
Now we understand that the cambium tissue needs to line up together, we know that everything must be clean. And the rootstock or scion should not dry before placing together. Understood? Good. Making the CutSo we are all cleaned up, and understand about lining up the tissues. But there is one last hurdle that can mean success or failure. Dry cuts. In general the juicier the cacti the better. This means they must be actively growing (more juices flow to the top of the cactus). Non growing, non juicy plants, rarely take to grafts well. The other worry is that once we cut the cactus we take too long and it begins to dry, this is not good. Working steadily but quickly is the best way to success. But there are tricks. The most useful method we found was to make 2 cuts on the rootstock. First cut the top of the plant off. Then cut another 2mm slice on the top and leave it on the plant. The top of this spice will likely dry a bit, but under is still fresh and juicy. When your scion is ready you can simply pick off that slice and put the scion right on, as if you had just cut it. This will save time, and risk of bumping and accidents with knives etc. If it still appears to be dry then another method is often used. You can take a leaf, preferably a small lower one, and squeeze out some juice from the leaf to the cut, this will keep t moist for a little while longer, but is generally not needed given how juicy Pereskiopsis spathulata is. Ok, we are armed and ready to start the cuts. It is a good idea to cut the root stock first. Remember to cut a slice that you will remove later. So continue to make a flat cut on the top of your plant. Try to find somewhere on the plant that is a little larger than your scions diameter. Once the top is cut continue to make your second cut on the rootstock 2 mm down, leave that slice on the rootstock with no air bubbles. Now move over to your seedling. Take your seedling and proceed to make a cut, I usually cut at the widest part. The seedling halves should both stick to your blade, which will keep them from air exposure and drying. 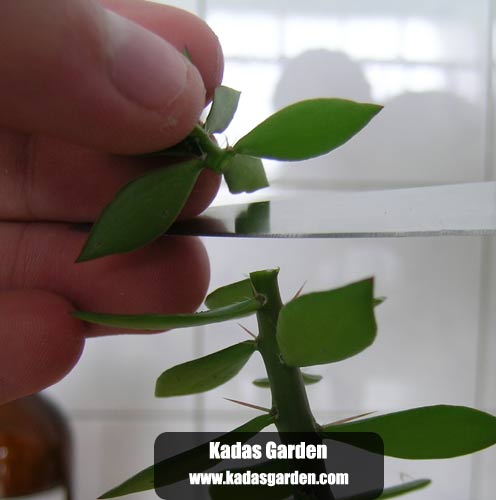 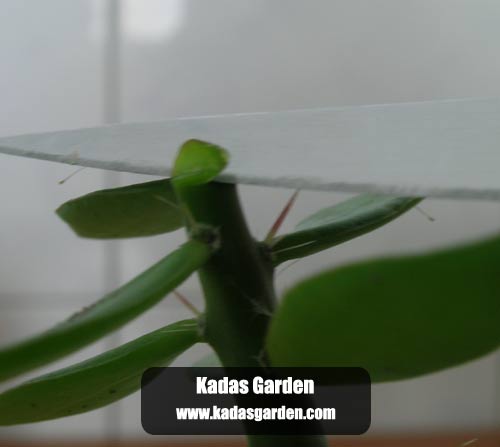 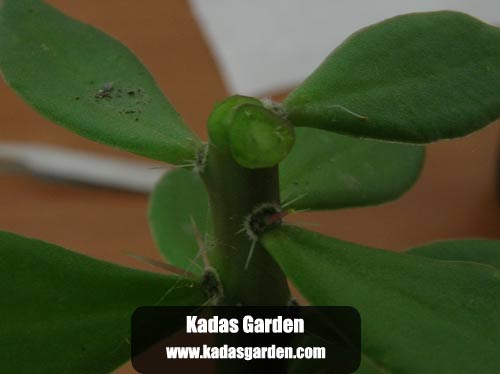
Joining them togetherNow the cuts are made. Either use your tweezers or fingers and get ready to move it onto the rootstock. Moving as quickly as you can (while keeping hand control) remove that 2mm slice from your rootstock and place the top half of the cut seedling onto the rootstock. Once it is on you have a little play time, but not much. Try your best to line up the tissues as discussed earlier. Once satisfied they are lined up, press down lightly to try and remove any air bubbles between the 2 cacti. air bubbles can lead to raised grafts, grafts that completely fall off or infection. When using seedlings and Pereskiopsis it is not often needed to weight down the scions. Simply just stick them together and if the join is good they should attach no problem. 
After careWell as you could imagine after being cut in half, they are rather susceptible to the outside environment. As they dry up it is essential to keep them in high humidity. Another reason Pereskiopsis is so handy is that you can keep them in very humid conditions for prolonged periods with no ill effects. Now the scion is firmly attached to the rootstock and you are happy. While the 2 heal together they must be placed inside a humid container. With 6" rootstocks in a 4" pot we use 2 liter pop bottles with the bottoms cut off. We choose this because they fit over the pots nicely and the top can screw on/off to control humidity. Many people use plastic totes, plastic bags, aquariums etc...It is all about preference. The main idea is to keep humidity around 80%+ Once the humidity area is chosen (we use plastic bottles inside an open aquarium) place the cactus inside. We keep all our grafts at 25-30 degrees Celsius. Every 2 days we take off the pop bottles and spray the inside with a fine mist of water and place back on top. This allows air exchange and high humidity. You want to avoid stagnant air, this will invite many types of bad news. After about a week we stop spraying water. After another 3 days or so we loosed the cap on the bottle, and 3 more days remove it. Depending how healed it looks we will remove the bottle completely about 14-18 days after the initial cuts and leave it in the aquarium which is about 60% humidity. 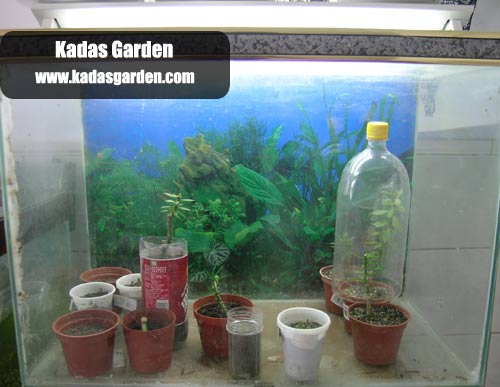
Lighting: We find that the grafts do better when placed under artificial lighting while healing, nothing strong. We use 2 24" fluorescent tubes over a 29 gallon aquarium for all our Pereskiopsis grafts. |
